Publishing a Yearbook for Sale
On this page
Step 1: Access Your Store
Step 2: Manage Sales Settings
Step 3: Choose a Sales Method
Step 4: Select Distribution Method (Pre-Order Only)
Step 5: Choose Products & Add-Ons
Step 6: Set Pricing
Step 7: Enter Financial Contact Information
Step 8: Final Store Settings
Step 9: Publish Your Yearbook
Once your yearbook project is complete or in progress, you can publish it in your online store for customers to purchase. Follow the steps below to publish your book using either Pre-Order or Published Ordering options.
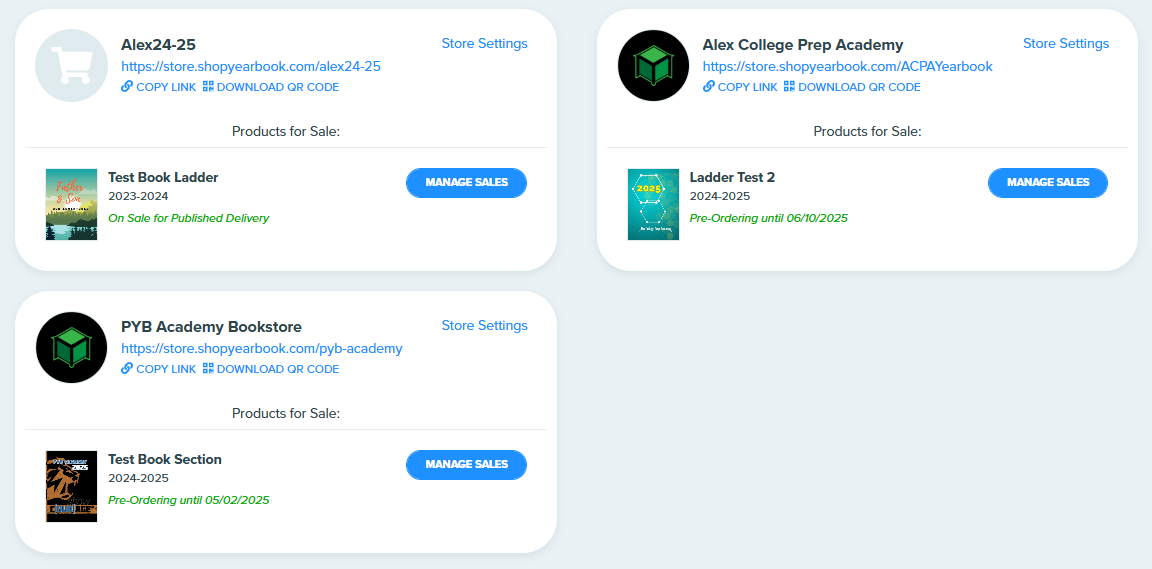
Step 1: Access Your Store
From Creator Studio’s home screen, click the Sell tab.
You’ll see a list of your created stores.
3. If your project isn’t assigned to a store yet:
Click Store Settings next to the store name.
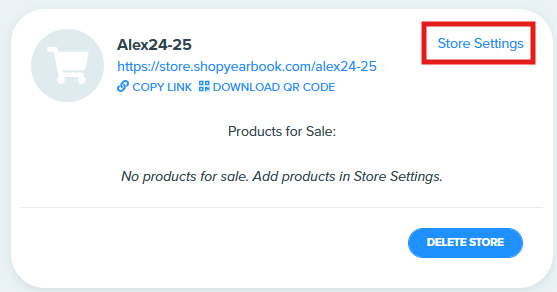
Scroll to Yearbooks for Sale and check the box next to your project.
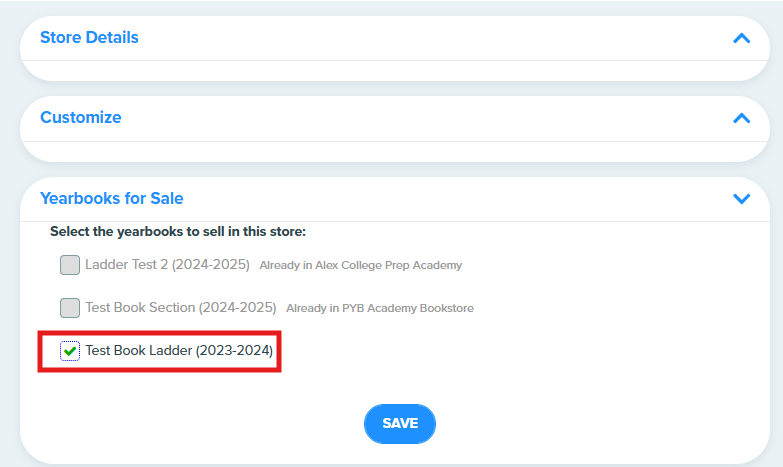
Click Save.
The book will now appear under this store and be marked as Not Published.

Step 2: Manage Sales Settings
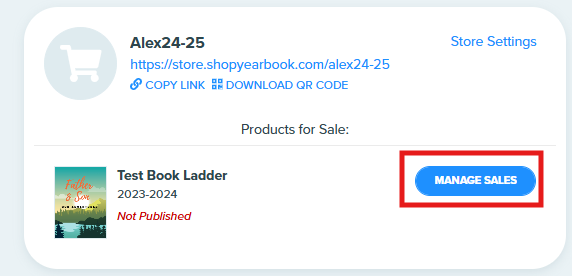
Find your book under the Sell tab.
Click Manage Sales next to the book name.
Step 3: Choose a Sales Method

Published Ordering
Use this option if your book is complete and ready to print.
Orders are printed on demand and shipped directly to the customer’s home.
No printing occurs until a customer places an order.
Pre-Order
Use this if you're collecting orders before the book is complete.
Set a Pre-Order Deadline for customers.
Once the book is finished, all pre-orders are printed and shipped together.
Step 4: Select Distribution Method (Pre-Order Only)
Ship to One Location:

All books are shipped in bulk (e.g., to your school).
Includes a manifest of buyers for easy distribution.
Ship to Customer:
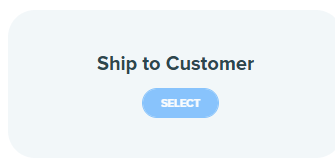
Disabled by default. Contact your Account Manager to enable.
Set your Preorder Deadline and fill out your shipping information, then click Next

Step 5: Choose Products & Add-Ons
Book Types
Select the formats you want to offer: Hardcover, Softcover, or eYearbook.
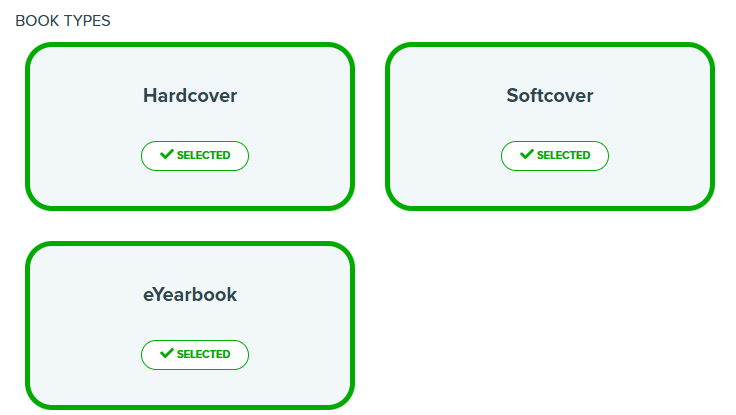
Ensure hardcover/softcover options are enabled in the yearbook editor before publishing.
Cover Finish
Choose between Matte or Glossy finish.

Add-Ons
Name Plates: Name engraved on a silver metal plate with adhesive backing (must be applied by customer)
Available for Published Ordering and Preordering (shipped separately from bulk orders)
Name Plates do not increase turnaround time.
Personalized Cover Stamping: Name foil-stamped in silver or gold on the cover.
Not available for Published Ordering.
Personalized Pages: Customers can add custom pages at the back.
First 4 pages: $8.95
Add up to 8 extra pages: $1.50 each
⚠️ You cannot offer both cover stamping and personalized pages simultaneously.
Turnaround time for books with Personalized Pages or Name Stamping is 4 weeks (20 business days).
Step 6: Set Pricing
The Estimated Page Count shows the current number of pages.

Pricing updates automatically as you adjust the page count.
Set your Sale Price for hardcover/softcover to:
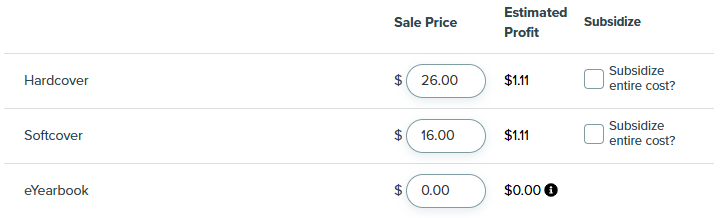
Earn profit (enter a higher price)
Subsidize cost (enter a lower price)
💡 Profit is only paid out on Pre-Orders, not Published Orders.
Your estimated profit or loss per book appears beside each price.
Click Next.
Step 7: Enter Financial Contact Information
Provide contact details for the person responsible for payments and profit handling.
If you earn profit, choose one of the following:
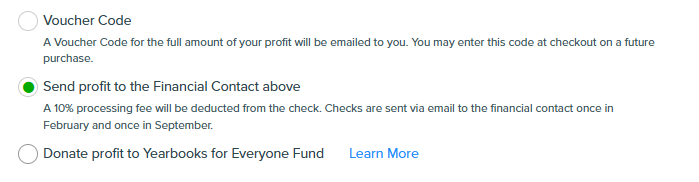
Have the profit sent to the school
Profit Check - Receive an eCheck for your profit minus a 10% processing fee.
Voucher Code - Receive the full amount of your profit in a code that can be used to purchase future yearbooks
Donate it to the Yearbooks for Everyone Fund, which helps schools provide books to students in need.
Click Next.
Step 8: Final Store Settings
Note to Customer: This message appears on the store page and in a pop-up during checkout.

Cover Preview:
Show current cover design
Or select Top Secret to hide the cover until printed

Book Distribution: (for bulk Pre-Orders)
Student names collected at checkout are included in your distribution manifest.
Personalized books will have labeled covers with student name and grade.
Donate a book (Optional for bulk Pre-Orders):
When enabled, your store can offer customers the opportunity to donate additional copies of the yearbook directly to your organization (e.g., for students in need or classroom libraries).
Click Next.
Step 9: Publish Your Yearbook
Carefully review all settings on the Publish step. Once ready, click Publish.
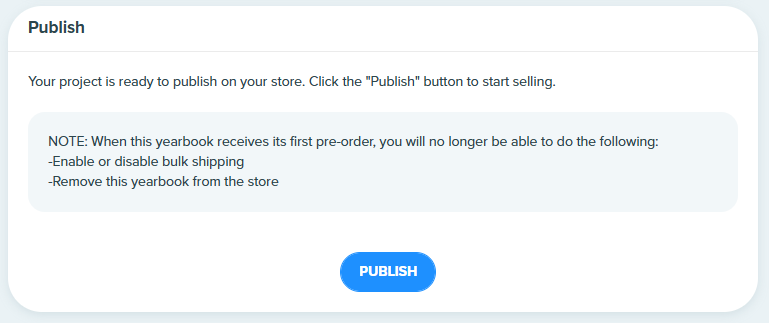
Your book will now be available for purchase at the store URL you selected.